Arthur Range Walk - January 2006 - Part 4
All images © David Noble. No image can be used for any purpose
without permission.
Day 6 - January 20

Above - Sarah packs up and farewells us. She walks back via Morraine K

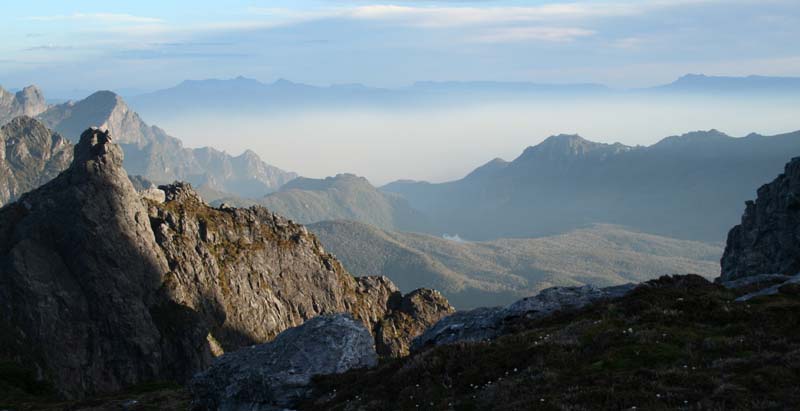
Above - View west from the Phoenix

Above - View north-east from the Phoenix - Lakes Venus and Mercury and
West Portal and the Crags of Andromeda

Above - Crags below the Phoenix

Above - Looking back (west) from the slopes of West Portal

Above - Western Arthur Peaks from West Portal

Above - West Portal and the Crags of Andromeda

Above - The Crags of Andromeda from Lucifer Ridge

Above - The Crags of Andromeda
Day 7 - January 21

Above - James scrambling near the Boiler Plates

Above - Federation Peak from Stuart Saddle

Above - the Four Peaks

Above - Small pandani near Hanging Lake

Above - Looking back down the Eastern Arthurs

Above - the Four Peaks

Above - the Four Peaks

Above - Bushfire smoke - The Old River Valley. The fire had started on
the morning of the day before - lit by a lightning strike on Mt Castor
on the Spero Range.

Above - Dusk

Above - Everlasting daisies
Day 8 - January 22
With a a lot of bushfire smoke around - we decided to return as fast as
possible back to Pass Creek. We set off from Hanging Lake before 7 am.
The day was very windy (westerly winds - so the fire was blowing
towards us) and the temperature in Hobart that day was 39° C.

Above - Dawn - the Devils Thumb

Above - Dawn - the Four Peaks - note the bushfire smoke
Above - Dawn

Above - Federation Peak from near Goon Moor

Above - Bushfire plume from near Pass Creek after a very hot windy day.
Federation peak just visible on the left and the Dial on the right. We
had a 4 hour lunch break at Pass Creek - sheltering in the shade from
the heat. This photo was taken just as we left to walk to Craycroft
Crossing about 5pm.
Day 9 - January 23

Above - Seven Mile Creek

Above - Native Laurel
Day 10 - January 24
We caught the bus back to Hobart from Scotts Peak Dam
Return to menu
Return to david-noble.net